Setting up a really basic auto attendant is quite simple. It will take less than a minute once you get the hang of it.
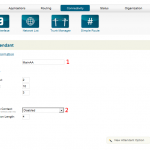
Add a New Auto Attendant: Image 1
- Click Applications
- Click Auto Attendant
- Click Add Auto Attendant
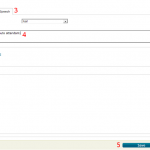
Auto Attendant Settings: Images 2 & 3
- Give the Auto Attendant a meaningful name.
- Set the Context to Internal (yes, the image has it wrong)
- Click Text To Speech
- Type what you want it to say.
- Click Save
Now the Auto Attendant isn’t very effective because it can’t yet handle keyed in data (that’s what the New Attendant Option button is for), and that is pretty self-explanatory so I thought I’d leave it to you to explore.
More importantly, one more step needs to be taken to receive calls. As of now, the auto attendant we just setup won’t answer yet, because we haven’t setup our number or configured our router to port forward. That’s the next tutorial.